
Imagine making the most delicious brioche buns in your kitchen. These soft breads will change your baking game. They bring professional quality to your meals.
Making homemade buns is more than cooking. It’s an art that connects you to baking traditions. Our guide will show you how to make golden, buttery brioche. It will impress your family and friends.
These brioche buns are perfect for any meal. They add a special touch to burgers or breakfast. They offer a soft texture and rich flavor that store-bought can’t match. Start your baking journey and fill your kitchen with amazing smells!
Understanding Brioche: A Rich French Bread Tradition
Explore the world of French bread that’s more than just a simple loaf. Brioche is a highlight in the rich bread world. It shows the skill of French baking traditions.
Brioche is more than a simple bread. It’s a culinary masterpiece that shows French cooking at its best. This fancy French bread is known for its special ingredients and how it’s made.
Origins of Brioche Bread
The history of brioche goes back to medieval France. Skilled bakers there created a special bread that became a cultural symbol. It started in Normandy and soon spread all over France, winning hearts with its unique taste.
- Documented in cookbooks for over 500 years
- Created by French royal bakers
- Shows off culinary skill
What Makes Brioche Different from Regular Bread
Brioche is special because of its ingredients. The main differences are:
- High butter content makes it very soft
- Eggs add rich flavor and a golden color
- Milk makes it extra tender
Cultural Significance in French Baking
Brioche is more than just food. It’s a culinary art form that’s a big part of French culture. Bakers see this bread as a way to show off their talent. They turn simple ingredients into a delicious treat that tells a story of tradition and skill.
“Brioche is not just bread; it’s a celebration of French culinary heritage.” – French Culinary Institute
Essential Ingredients for Perfect Brioche Buns
Making delicious brioche buns begins with knowing the key ingredients. These ingredients turn simple dough into a rich, luxurious bread. Your baking essentials are key to getting that soft, buttery texture brioche is famous for.
“Great bread begins with exceptional ingredients” – Master Baker’s Wisdom
Now, let’s look at the main parts that make brioche a true culinary gem:
- High-protein bread flour for structure
- Active dry yeast for perfect rising
- Large farm-fresh eggs for richness
- Whole milk for tenderness
- High-quality butter in bread making
- Granulated sugar for subtle sweetness
The quality of butter in bread is very important. Choose European-style butter with more fat for a smooth, luxurious texture. Make sure your eggs are room temperature so they mix well with the dough.
| Ingredient | Purpose | Recommended Quantity |
|---|---|---|
| Bread Flour | Provides protein structure | 3-4 cups |
| Butter | Adds richness and flavor | 1/2 cup (softened) |
| Eggs | Creates tender crumb | 3-4 large eggs |
| Active Dry Yeast | Enables rising | 2 1/4 teaspoons |
Knowing these baking essentials will make your brioche amazing. Each ingredient is important for that perfect, soft texture you want.
Kitchen Tools and Equipment Needed
To make brioche buns, you need the right kitchen tools. The right baking tools can make your bread perfect and fluffy. Whether you’re experienced or new, the right tools will help you succeed.
Before starting your brioche journey, let’s look at the key baking tools you’ll need. These tools are essential for making these tasty buns.
Must-Have Baking Tools
- Stand mixer with dough hook attachment
- Large mixing bowl
- Baking sheet
- Pastry brush
- Measuring cups and spoons
- Plastic wrap
- Parchment paper
Optional but Helpful Equipment
While not essential, these tools can improve your brioche-making:
- Digital kitchen scale
- Bench scraper
- Silicone dough mat
- Proofing basket
- Instant-read thermometer
Measuring and Temperature Tools
| Tool | Purpose | Recommended Type |
|---|---|---|
| Digital Scale | Precise ingredient measurement | Gram-capable scale |
| Instant-Read Thermometer | Check yeast and dough temperature | Digital probe thermometer |
| Measuring Cups | Measure dry and liquid ingredients | Stainless steel or glass set |
Quality baking tools lead to better results and a more enjoyable baking experience. The right tools can turn your home baking from good to great.
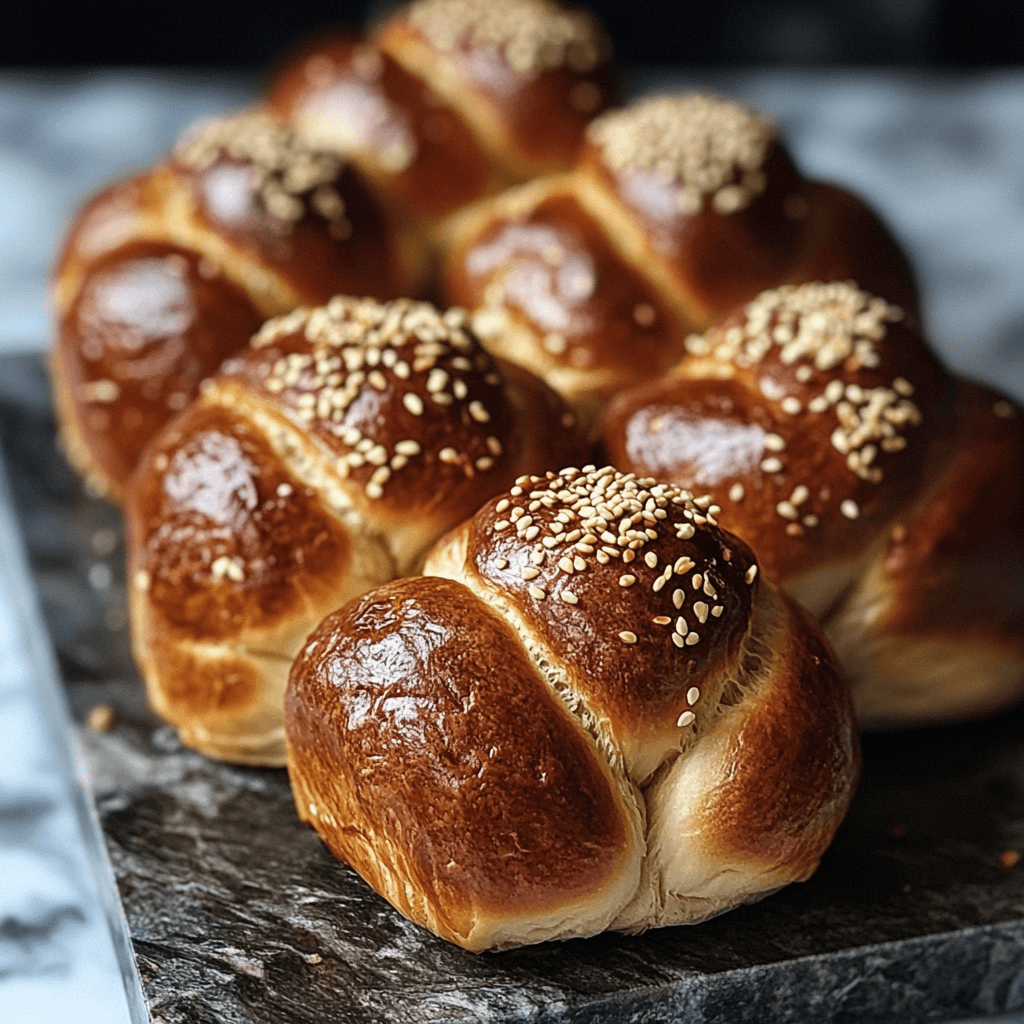
Soft Brioche Buns 🍞🧈

Making perfect soft brioche buns needs care and love. These fluffy bread rolls turn simple ingredients into golden, soft treats. Your homemade brioche will be the highlight of any meal, from breakfast to dinner.
Now, let’s look at the key ingredients for your soft brioche buns:
- 4 cups all-purpose flour
- 1/4 cup granulated sugar
- 2 1/4 teaspoons active dry yeast
- 1 teaspoon salt
- 4 large eggs
- 1/2 cup warm milk
- 1/2 cup unsalted butter, softened
Getting your ingredients ready is key for amazing soft brioche buns. Quality is important for these delicate, rich bread rolls.
| Ingredient | Quantity | Purpose |
|---|---|---|
| Flour | 4 cups | Provides structure |
| Eggs | 4 large | Adds richness |
| Butter | 1/2 cup | Creates tenderness |
Expect to get 8-12 beautiful homemade brioche buns based on size. These bread rolls are great for burgers, sandwiches, or enjoying with butter straight from the oven.
Pro tip: Make sure all ingredients are at room temperature for the most tender brioche buns.
Mastering the Dough Mixing Process
Making perfect brioche buns needs careful dough mixing. You must know how to mix ingredients right. This turns simple parts into a soft, tasty bread.
Dough mixing is like an art. It needs patience and skill. This makes your brioche soft and tasty.
Proper Yeast Activation: The Foundation of Great Bread
Yeast activation is key for good brioche. Here’s how to activate yeast right:
- Use warm water between 100-110°F
- Add a pinch of sugar to feed the yeast
- Let it sit for 5-10 minutes until foamy
Combining Wet and Dry Ingredients
When mixing wet and dry ingredients, aim for a smooth mix. This helps the bread get its special texture. Mix slowly to avoid lumps and ensure even mixing.
| Ingredient Type | Mixing Technique | Purpose |
|---|---|---|
| Dry Ingredients | Sift together | Prevent clumping |
| Wet Ingredients | Whisk thoroughly | Create uniform mixture |
Butter Integration Techniques
Butter is very important in bread making, like in brioche. Room temperature butter is best for mixing smoothly into the dough. Cut the butter into small pieces and add slowly. Make sure each piece is fully mixed before adding more.
Your goal is a silky, smooth dough. This makes your brioche buns very tender. Mix slowly and carefully to get the right texture.
The Art of Kneading Brioche Dough

Kneading dough is key to making perfect brioche buns. It turns a messy mix into a smooth, elastic dough. This dough will give your bread a great texture.
When kneading starts, you unlock the secret to gluten. Gluten is what makes bread chewy and holds its shape. Your goal is to build this network in the dough.
Kneading Techniques for Perfect Brioche
- Start with room temperature ingredients
- Use the heel of your hand to push and fold the dough
- Rotate the dough quarter-turn between each knead
- Aim for a smooth, elastic consistency
Professional bakers say proper kneading takes patience. You’ll knead your brioche dough for 10-15 minutes by hand. Or 5-7 minutes in a stand mixer. The dough should feel silky and spring back when pressed.
| Kneading Method | Time Required | Expected Texture |
|---|---|---|
| Hand Kneading | 10-15 minutes | Smooth, elastic |
| Stand Mixer | 5-7 minutes | Silky, windowpane test passes |
Pro tip: Test your dough’s gluten with the windowpane test. Stretch a small piece of dough. If it’s translucent without breaking, you’ve got perfect gluten!
Remember, kneading is where the magic happens in bread making. Take your time and enjoy the process!
Proofing and Rising Techniques
Dough proofing is key to making light, airy brioche buns. It turns simple ingredients into a magical, fluffy dough. Knowing how to proof will make your buns delicious every time.
First Proofing Guidelines
The first rise adds deep flavor. It lets yeast fermentation work its magic. Here’s how to help your dough grow:
- Choose a warm, draft-free location
- Cover the dough with a clean kitchen towel
- Maintain a temperature between 75-80°F
Second Rise Requirements
After shaping, the second rise is key for the perfect texture. It makes the dough lighter and more refined:
| Proofing Factor | Ideal Condition |
|---|---|
| Temperature | 70-75°F |
| Humidity | 75-80% |
| Time | 45-60 minutes |
Visual Cues for Perfect Proofing
Watch for these signs to know when your dough is ready:
- Gentle Indentation: Press lightly with a finger. The dough should slowly spring back
- Increased Volume: Dough should nearly double in size
- Smooth, Puffy Appearance
Pro tip: Patience is key in bread rising. Rushing the proofing process can compromise your brioche’s delicate texture.
Shaping and Forming Beautiful Buns

Learning to shape bread is key for making stunning brioche rolls. Your hard work in preparing the dough has brought you to this moment. Now, your skills will turn a simple mix into gorgeous buns that will wow everyone.
When shaping buns, it’s important to be gentle. This helps keep the air bubbles in the dough. These bubbles make brioche light and fluffy.
- Start with a clean, lightly floured surface
- Divide your dough into equal portions
- Use a light touch when shaping
- Create smooth, round surfaces
Experts say a special technique is best for shaping brioche rolls. Wrap your fingers around the dough ball and twist it on the surface. This makes the dough tight and smooth, leading to a golden-brown bun.
“The secret to perfect brioche is in the shaping – treat the dough like a delicate treasure.” – Professional Baker’s Wisdom
Trying different shapes can make your brioche rolls stand out. You can go for classic round buns or try braided ones. The key is to shape them the same way for even baking and a nice look.
- Round buns: Perfect for burgers
- Braided rolls: Elegant for special occasions
- Mini buns: Great for appetizers
Getting better at shaping bread takes practice. Don’t worry if your first tries aren’t perfect. With each attempt, you’ll get better at making brioche.
Baking Tips for Golden Brown Results
Getting a perfect golden crust is the main goal in baking brioche. Your oven temperature is key to turning a simple dough into a masterpiece. Learning the art of baking brioche can make your bread go from good to great.
Mastering brioche baking needs precision and focus. The right steps can give you buns that are golden outside and soft inside.
Temperature Control Strategies
Getting the oven temperature right is vital for a golden crust. Here are some tips for perfect results:
- Preheat your oven to 375°F (190°C)
- Use an oven thermometer for accuracy
- Position the rack in the middle of the oven
Timing and Doneness Tests
Knowing when your brioche is done needs careful watching. Look for these signs:
| Doneness Indicator | What to Look For |
|---|---|
| Color | Deep golden brown surface |
| Texture | Crisp exterior, soft interior |
| Sound Test | Hollow sound when tapped |
Achieving the Perfect Crust
To get a stunning golden crust, brush your brioche with an egg wash before baking. This makes the surface glossy and adds flavor. Baking brioche is both science and art.
Storage and Freezing Methods
Keeping your homemade brioche buns soft needs careful storing. They deserve special care to keep their amazing texture and taste.
For bread freshness, start with room temperature storage. Put your brioche buns in an airtight container or sealed plastic bag. This keeps them soft for 2-3 days by preventing moisture loss.
Short-Term Storage Recommendations
- Store at room temperature in a sealed container
- Keep away from direct sunlight
- Avoid refrigerating, as it can dry out the buns
Freezing Brioche for Long-Term Preservation
Freezing brioche is great for keeping them longer. Wrap each bun in plastic wrap, then in a freezer-safe bag. This stops freezer burn and keeps them good.
| Storage Method | Duration | Quality Preservation |
|---|---|---|
| Room Temperature | 2-3 days | Good |
| Freezer Storage | Up to 3 months | Excellent |
To thaw frozen brioche, let it sit at room temperature for about an hour. For that fresh taste, warm it in an oven at 300°F for 3-5 minutes.
Pro tip: Always let brioche cool completely before storing to prevent condensation and sogginess.
Remember, proper storage is key to enjoying your delicious homemade brioche buns at their best!
Serving Suggestions and Pairings
Your freshly baked brioche buns are a blank canvas. They’re ready to be turned into tasty brioche serving ideas. These rich, buttery buns are perfect for making gourmet sandwiches and memorable meals. They will surely impress your family and friends.
Brioche bread pairings can make simple dishes into amazing culinary experiences. Here are some creative ways to use your homemade brioche buns:
Classic Burger Applications
Turn your ordinary burgers into gourmet masterpieces with these brioche serving ideas:
- Create a restaurant-style burger with premium ground beef
- Try vegetarian alternatives like black bean or portobello mushroom patties
- Add artisanal cheeses and fresh herbs for extra flavor
Creative Sandwich Ideas
Brioche buns are versatile for bread pairings beyond traditional sandwiches:
- Chicken salad with fresh herbs
- Grilled vegetable and goat cheese stacks
- Mediterranean-inspired falafel wraps
Breakfast and Brunch Uses
Elevate your morning meals with these gourmet sandwich suggestions:
- Eggs Benedict on toasted brioche
- Breakfast sliders with scrambled eggs
- French toast made from brioche buns
Your homemade brioche buns are more than just bread. They’re a delicious chance to get creative in the kitchen!
Troubleshooting Common Brioche Issues
Bread baking problems can be frustrating. But knowing the causes helps you make perfect brioche buns. A dense texture often comes from wrong yeast activation or not kneading enough.
Start by checking your yeast’s freshness. Make sure it blooms right in warm liquid before mixing.
Uneven baking usually comes from temperature issues or bad proofing. Fixing brioche means watching rising times and oven temperatures closely. Use an instant-read thermometer to check your dough’s temperature.
Also, make sure your oven heats evenly. Humidity and your kitchen’s environment affect dough too. If your brioche is too sticky, don’t add more flour.
Instead, use a bench scraper and let the dough rest. This helps gluten develop naturally. Cold ingredients slow yeast, so use room-temperature butter and eggs.
Professional bakers say practice makes perfect. Every try teaches you more about dough handling. Don’t get discouraged by early setbacks. Watch your dough’s texture and learn from small changes.
Adjust your technique to make delicious, soft brioche buns every time.

Soft, Fluffy Brioche Buns Recipe
Equipment
- – Baking sheet
- Parchment paper
- – Mixing bowls
Ingredients
- – 1 medium cauliflower cut into bite-sized florets
- – 1/2 cup all-purpose flour or chickpea flour for gluten-free
- – 1/2 cup water
- – 1/2 teaspoon garlic powder
- – 1/2 teaspoon onion powder
- – 1/4 teaspoon smoked paprika
- – Salt and pepper to taste
- – 1 cup buffalo sauce store-bought or homemade
- – 2 tablespoons olive oil
- – Optional: fresh parsley chopped, for garnish
Instructions
- **Preheat the Oven**: Preheat your oven to 425°F (220°C) and line a baking sheet with parchment paper.
- **Prepare the Cauliflower**: In a large bowl, combine the flour, garlic powder, onion powder, smoked paprika, salt, and pepper. Add the water and whisk until smooth.
- **Coat the Cauliflower**: Add the cauliflower florets to the batter, tossing them gently to coat each piece evenly.
- **Bake**: Arrange the coated cauliflower florets in a single layer on the prepared baking sheet. Bake for 20-25 minutes, flipping halfway through, until the cauliflower is golden brown and crispy.
- **Make the Buffalo Sauce**: While the cauliflower bakes, combine the buffalo sauce and olive oil in a small saucepan over low heat. Stir until the sauce is warm and well-combined.
- **Coat in Sauce**: Once the cauliflower is done, remove it from the oven and toss it in the buffalo sauce until fully coated.
- **Serve**: Garnish with fresh parsley if desired, and serve with a side of ranch or blue cheese dipping sauce.