
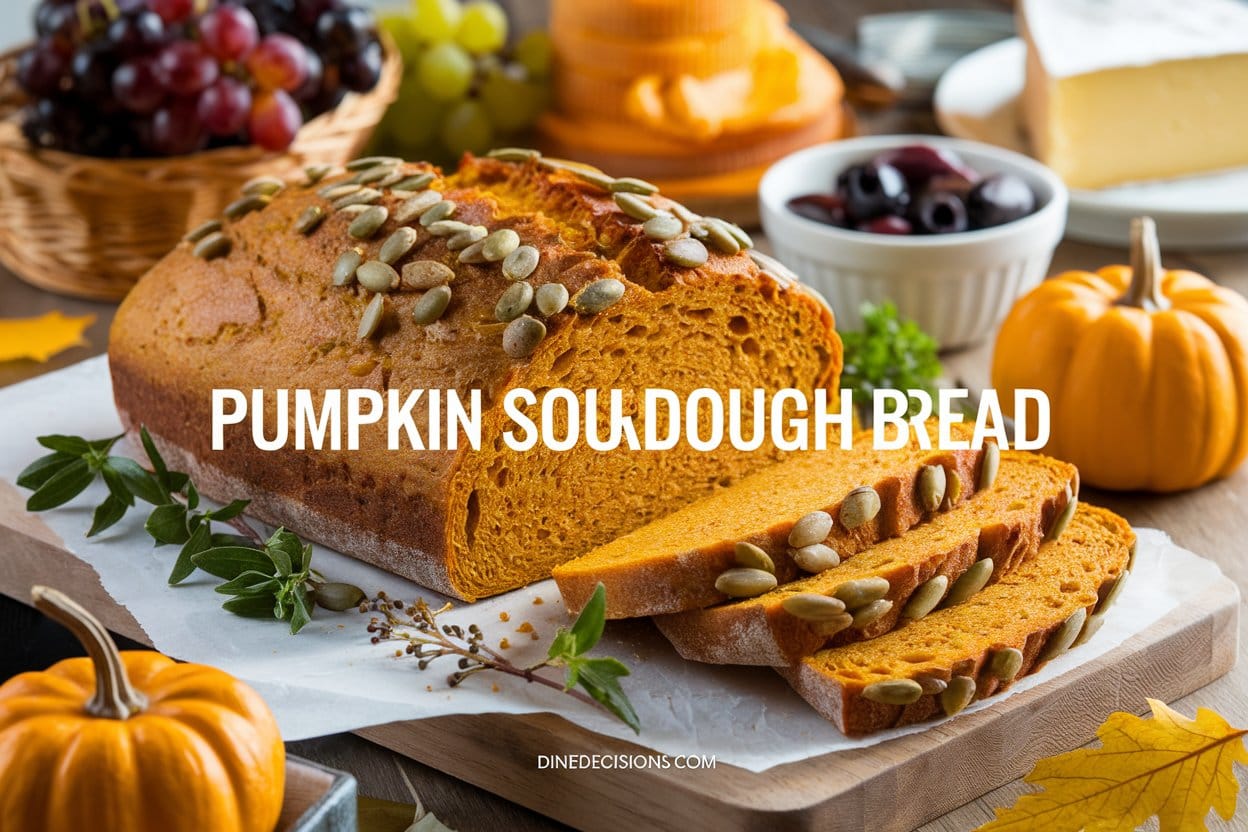
As autumn arrives, the air grows crisp and leaves turn colors. Nothing beats the smell of freshly baked pumpkin bread in your kitchen. This homemade pumpkin sourdough bread is a fall favorite. It mixes pumpkin’s bold taste with sourdough’s tangy notes for a special treat.
Whether you’re an experienced baker or new to homemade bread, this recipe is easy to follow. You’ll make a loaf of pumpkin-spiced goodness quickly.
Picture biting into a slice of this moist, soft pumpkin sourdough bread. Each bite is filled with cinnamon, nutmeg, and cloves’ warmth. The sourdough discard and almost a whole can of pumpkin puree make it both beautiful and flavorful.
This is the perfect autumn treat. It’s great for easy breakfasts, satisfying snacks, or with your favorite fall drinks.
The Perfect Fall Sourdough Creation
As the days get shorter and the air gets crisp, we all crave cozy autumn baking. A warm, fragrant loaf of pumpkin sourdough bread is perfect for the season. It mixes the cozy flavors of fall with the tangy taste of sourdough.
Why Autumn Baking is Special
Autumn baking is loved by many. The smells of cinnamon, nutmeg, and pumpkin bring comfort and nostalgia. It connects us to the changing seasons and lets us enjoy fall’s flavors.
Benefits of Homemade Bread
Homemade bread is more than just tasty. It gives a sense of pride and control over what goes into it. The act of mixing, kneading, and shaping is both calming and fulfilling.
Sourdough’s Unique Properties
Sourdough bread is known for its unique taste, texture, and digestibility. Its fermentation process gives it a tangy flavor and a chewy texture. Plus, its live cultures can make it easier to digest for some.
Mixing pumpkin’s cozy flavors with sourdough’s special qualities makes for a unique baking experience. Explore the world of autumn pumpkin starter, fall baking, and the amazing sourdough benefits in this recipe.
“Baking bread is one of the most satisfying and rewarding kitchen tasks. The aroma of freshly baked sourdough is simply unbeatable.”
Essential Ingredients for Pumpkin Sourdough Bread
Making the perfect pumpkin sourdough bread needs the right ingredients. The main parts of this autumn treat are key. They add flavor and make the bread soft and moist.
Main Components
- Sourdough discard: The tangy, fermented flavor of your sourdough starter is crucial for this recipe.
- Bread flour: With its high gluten content, bread flour helps create the ideal structure and chew in the finished loaf.
- Canned pumpkin puree: High-quality canned pumpkin, not pumpkin pie filling, lends a rich, velvety texture and vibrant color.
- Eggs: Eggs add tenderness, richness, and help bind the dough.
- Sweetener: A touch of brown sugar, maple syrup, or honey enhances the pumpkin flavor.
- Coconut oil: This healthy fat contributes moisture and a luxurious mouthfeel.
- Milk: Dairy milk or a non-dairy alternative like almond or oat milk adds creaminess.
- Spices: Warm spices like cinnamon, nutmeg, cloves, and ginger complement the pumpkin beautifully.
Optional Add-ins and Variations
To elevate your pumpkin sourdough, try these add-ins:
- Chocolate chips: For a decadent twist, fold in some dark or milk chocolate chips.
- Chopped nuts: Walnuts, pecans, or hazelnuts add crunch and nutty undertones.
- Dried cranberries: The tart-sweet flavor of dried cranberries pairs wonderfully with pumpkin.
- Alternate flours: Experiment with a portion of whole wheat flour or rye flour for a heartier texture.
- Adjustments to sweeteners: Play with the ratio of sugar, maple syrup, or honey to suit your taste preferences.
With these ingredients and add-ins, you’re ready to bake a pumpkin sourdough bread. It will delight your senses and warm your heart this autumn.

Kitchen Tools and Equipment Needed
Baking delicious sourdough baking tools and bread making equipment is key for perfect pumpkin sourdough bread. You’ll need basics like a large mixing bowl and digital kitchen scale. Special tools like a banneton basket and Dutch oven also help a lot.
A digital kitchen scale is a must for exact measurements. This is because the right mix of ingredients is vital for great results. Many bakers start simple and add more tools as they get better.
- Large mixing bowl
- Digital kitchen scale
- Bowl scraper
- Banneton basket or proofing bowl
- Danish dough whisk
- Dutch oven
- Parchment paper
- Lame or sharp knife for scoring
- Tea towel or plastic wrap for covering dough
These tools help with mixing, proofing, and baking your pumpkin sourdough bread. The right sourdough baking tools and bread making equipment make baking at home better. You’ll get a loaf that impresses everyone.
| Tool | Purpose |
|---|---|
| Digital kitchen scale | Precise measurements for consistent results |
| Banneton basket or proofing bowl | Effective for holding shaped dough during fermentation, especially when using inclusions |
| Dutch oven | Retains steam, aiding in oven spring for the perfect crust |
| Lame or sharp knife | Designed for scoring sourdough bread, creating a beautiful pattern |
With the right bread making equipment in your kitchen, you’ll be well on your way to baking the most delectable pumpkin sourdough bread.
Understanding Your Sourdough Starter
Keeping your sourdough starter active and healthy is key for baking great pumpkin sourdough bread. Feed it regularly with a 1:4:4 ratio of starter, water, and flour. This keeps it lively and ready for baking.
Maintaining Active Starter
Feed your sourdough starter every 12-24 hours, depending on the temperature. In cooler months, 24 hours is best. Warmer weather needs a 12-hour cycle. Keep it at 70-75°F for best growth.
Signs of Starter Readiness
Your starter is ready when it doubles in size and looks bubbly. This usually happens 4-12 hours after feeding. It should also pass the “float test,” where it floats in water, showing it’s mature.
Discard Options
Discard is the extra starter you remove during feedings. Don’t waste it! Use it in this pumpkin sourdough bread recipe. Fresher discard makes the bread less sour. You can also make pancakes, waffles, crackers, or biscuits with it.
| Sourdough Starter Maintenance | Optimal Conditions |
|---|---|
| Feeding Frequency | 12-24 hours, depending on temperature |
| Feeding Ratio | 1 part starter : 4 parts water : 4 parts flour |
| Room Temperature | 70-75°F |
| Time for Starter to Peak | 4-12 hours after feeding |
| Starter Discard Usage | Can be used in recipes, less sour flavor with fresher discard |
Understanding sourdough starter care is crucial for baking perfect pumpkin sourdough bread. Keep your starter active and healthy. This will reward you with a delicious, textured loaf every time.
Mixing and Fermentation Process
Making the perfect pumpkin sourdough bread starts with careful mixing and fermentation. First, mix the wet and dry ingredients separately. Then, combine them. Let the dough rest for 30 minutes to fully hydrate the flour.
Next, do the stretch and fold technique. Stretch and fold the dough every 30 minutes for 2 hours. This builds the dough’s strength and extensibility.
The bulk fermentation stage is magical. Here, the dough rises slowly at 68-70°F for 9-11 hours. Warmer temperatures speed up fermentation, while cooler temps slow it down. Watch the dough closely, as sourdough fermentation is crucial for the perfect crumb and flavor.
“The bulk ferment is where the dough truly comes alive, transforming into a flavorful, airy masterpiece.”
As pumpkin dough mixing and bulk ferment progress, the dough grows and becomes smooth. Be patient during this stage. The effort will be worth it when you slice into your freshly baked loaf.
| Ingredient | Amount | Baker’s Percentage |
|---|---|---|
| Bread Flour or All-Purpose Flour | 450 grams | 50.00% |
| Pumpkin Puree | 200 grams | 30.00% |
| Milk | 100 grams | 20.00% |
| Water | 50 grams | 35.00% |
| White Sugar | 25 grams | 10.00% |
| Sourdough Starter, active | 100 grams | 4.60% |
| Salt | 10 grams | 1.90% |
| Butter, unsalted | 54 grams | 16.00% |
Mastering the Stretch and Fold Technique
Starting your pumpkin sourdough bread baking journey? Learning the sourdough stretch and fold technique is key. It makes your dough strong and airy, giving your bread a great texture.
Step-by-Step Guide
- Start by stretching a part of the dough up, like a windowpane. This strengthens the gluten.
- Then, fold the dough over itself, making a neat package. Turn the bowl 90 degrees and do it again, covering the whole dough.
- Do this sourdough stretch and fold every 30 minutes for the first 2 hours. It helps the dough grow stronger.
Common Mistakes to Avoid
- Don’t tear or flatten the dough too much. Be gentle to keep its shape.
- Remember to turn the bowl with each fold. This spreads the stretching evenly.
- Don’t overwork the dough. It can ruin the gluten network you’re building.
Getting good at the sourdough stretch and fold takes time. But it’s worth it. With patience, you’ll make a stunning pumpkin sourdough loaf that will wow everyone.

Shaping and Scoring Your Loaf
Learning to shape and score your pumpkin sourdough bread is crucial. It helps you get that artisanal look and a great oven spring. Begin by stretching the dough into a rectangle on a lightly floured surface. You can add cinnamon sugar or other tasty ingredients to create swirls or pockets of flavor.
Then, fold the dough like a letter and roll it up to build tension. Place the dough, seam-side up, in a proofing basket or bowl. This keeps the loaf’s round shape as it rises.
When baking time comes, put the dough on a parchment-lined baking sheet or in a Dutch oven. Use a sharp lame or knife to score the top with a deep “C” shape slash. This allows the bread to expand and gives it a classic sourdough look.
- Aim for a scoring depth of around 1/4″ to 1/2″
- Different flours, like rye, may impact the ideal scoring technique
- Freeze the dough for 30 minutes before scoring for cleaner, more defined patterns
- Utilize stencils like the Sourdough Fever Stencil Set for intricate designs
Happy scoring! With practice, you’ll shape and score your pumpkin sourdough loaves like a pro.
Baking Temperature and Timing Guidelines
To get the perfect crust on your pumpkin sourdough bread, you need the right baking temperature and timing. Preheat your oven to 450°F (230°C) with a Dutch oven or baking vessel inside. This high heat and the steam from the Dutch oven help create a crisp, golden crust.
Dutch Oven Method
Bake the dough covered in the preheated Dutch oven for 35 minutes. This traps the steam, helping the bread’s interior cook while the crust starts to form. Then, remove the lid and bake for another 5-10 minutes until the crust is just right.
Crust Development Tips
- For an even crisper crust, bake with the oven door slightly ajar for a few minutes after the first 35 minutes. This lets any extra moisture evaporate, making the crust crunchier.
- Watch the crust closely during the last baking stage. The pumpkin puree can make the crust brown fast. Adjust the oven temperature or baking time to get your perfect loaf.
By following these guidelines, you’ll get a pumpkin sourdough bread with a caramelized crust and a soft interior. It’s a great addition to your autumn baking.
| Baking Step | Temperature | Duration |
|---|---|---|
| Preheat Oven with Dutch Oven | 450°F (230°C) | – |
| Bake Covered in Dutch Oven | 450°F (230°C) | 35 minutes |
| Bake Uncovered in Dutch Oven | 450°F (230°C) | 5-10 minutes |
| Crack Oven Door (optional) | 450°F (230°C) | Few minutes |

“The Dutch oven method is a game-changer for achieving a professional-level crust on homemade sourdough bread. The combination of high heat and trapped steam creates the perfect environment for crust development.”
– Julia, Avid New England Sourdough Baker
Storage and Preservation Methods
Keeping your homemade pumpkin sourdough bread fresh is important. With the right storage, you can enjoy it for days. This autumnal treat is sure to delight.
First, let your loaf cool down completely before you slice or store it. This step helps the bread stay fresh longer. For up to 24 hours, you can store it at room temperature, covered.
To keep it longer, sourdough bread storage works best when you slice and freeze it. Wrap each slice in plastic or parchment paper. Then, put them in an airtight container or bag. This way, your bread stays fresh for 2-3 months in the freezer.
When you’re ready to eat, just thaw the slices at room temperature. You can also toast or warm them in the oven. This brings back their fresh taste and smell. But, don’t refrigerate your sourdough. The cold air can make it dry out faster.
Storing your bread in a paper bag or bread box is another good idea. The bag’s pores help control moisture. This keeps your bread from getting soggy or too dry. It’s great for keeping it fresh for a few days.
Remember, the secret to keeping sourdough bread fresh is proper storage and care. By following these tips, you can enjoy your homemade pumpkin sourdough for days. It’s a treat that’s sure to comfort you.
“Freshly baked bread should be allowed to cool and fully set before slicing, preferably waiting for at least an hour or more before cutting.”
Conclusion
Pumpkin sourdough bread is a mix of sourdough’s tang and autumn spices’ warmth. It’s also sweet from the pumpkin. You can add different things to it, making it great for breakfast, snacks, or with meals.
This bread is special because of sourdough and pumpkin’s health benefits. It’s made with less sugar and has a unique taste. Try it with your favorite toppings for a tasty treat.
Whether you’re new to sourdough or experienced, this recipe is a great way to enjoy fall. Start baking, be creative, and enjoy the cozy flavors of this autumn treat.
Easy Pumpkin Sourdough Bread Recipe | Homemade Goodness
Equipment
- – Large mixing bowl
- – Digital kitchen scale
- – Bowl scraper
- – Banneton basket or proofing bowl
- – Danish dough whisk
- – Dutch oven
- Parchment paper
- – Lame or sharp knife for scoring
- – Tea towel or plastic wrap
Ingredients
- – 450g bread flour
- – 200g canned pumpkin puree
- – 100g milk or dairy alternative
- – 50g water
- – 25g white sugar
- – 100g active sourdough starter
- – 10g salt
- – 54g unsalted butter
- – 1 tsp cinnamon
- – ½ tsp nutmeg
- – ¼ tsp ground cloves
- – Optional add-ins: chocolate chips nuts, dried cranberries
Instructions
- **Prepare Sourdough Starter:** Feed your starter 12-24 hours before baking for peak activity.
- **Mix Ingredients:** In a large bowl, combine the pumpkin puree, milk, water, sugar, and melted butter. In a separate bowl, mix the bread flour, spices, and salt. Slowly add the dry ingredients to the wet mixture, followed by the sourdough starter.
- **Knead Dough:** Mix until dough begins to form. Rest for 30 minutes to hydrate.
- **Stretch and Fold:** Perform stretch and fold technique every 30 minutes for 2 hours to develop dough strength.
- **Bulk Fermentation:** Cover dough and let it rise for 9-11 hours at 68-70°F (ideal).
- **Shape and Proof:** Shape the dough and place it seam-side up in a banneton or proofing bowl. Let rise for 1-2 hours, until slightly puffy.
- **Preheat Oven:** Preheat oven to 450°F (230°C) with Dutch oven inside.
- **Score and Bake:** Score the dough with a lame or knife, then transfer it to the Dutch oven. Bake covered for 35 minutes, then uncover and bake for 5-10 more minutes until the crust is golden.
- **Cool:** Allow the bread to cool completely before slicing.
This site has become my kitchen bible. The recipes are always a hit with my family!